

Create a New App

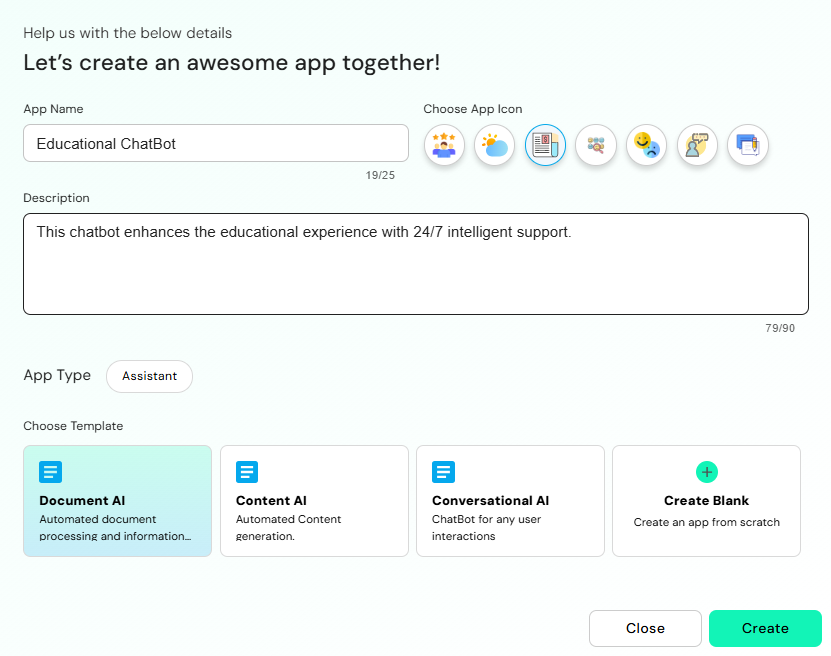
App Name
Provide a unique and descriptive name for your app. This helps in identifying it easily across the platform.Example:
Academic ChatBotChoose App Icon
Select a relevant icon from the available options to visually represent your app. This icon will appear in listings, dashboards, and overviews.Description
Add or edit a concise description that captures the purpose or functionality of the app. You’re allowed up to 90 characters. Example: This chatbot enhances the educational experience with 24/7 intelligent support.App Type
The App Type (e.g., Assistant) determines the nature of your application. This is typically pre-set based on the initial app creation.Choose Template
Pick a template that best suits your use case:- Document AI – For automated document processing and information extraction.
- Content AI – For generating content automatically.
- Conversational AI – For building a chatbot to handle user queries or conversations.
- Create Blank – Start an app from scratch without a pre-defined structure.
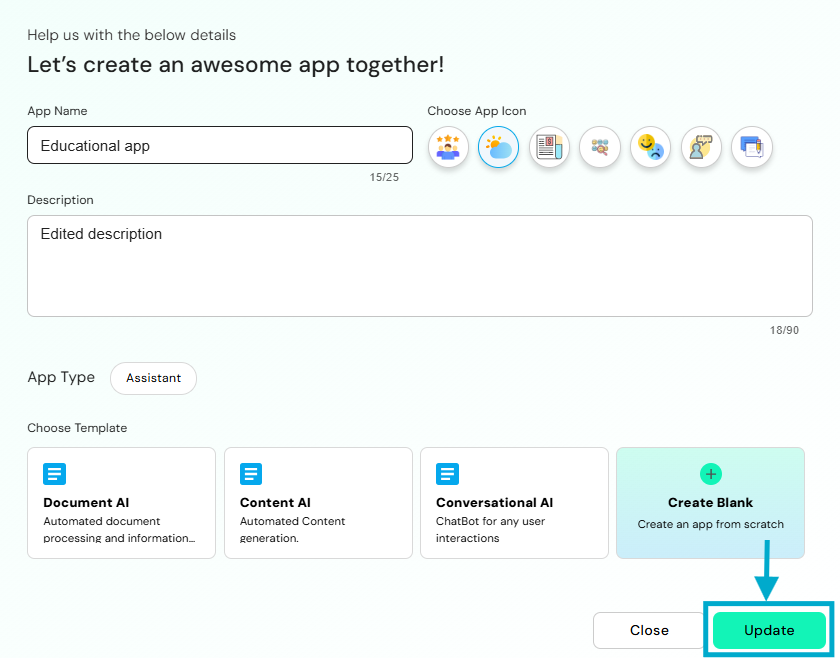
Save Changes
Once all details are filled and reviewed, click Update to save your changes. If you do not wish to proceed, click Close to exit without saving. Once an app is created, it appears under the Draft section on the dashboard. From here, Admins can configure the app’s behaviour, visibility, and access controls through the App Settings panel.This fine-grained permission model ensures that apps especially those containing sensitive data or tailored to specific business roles are only accessible to authorized users, aligning with your organization’s governance & compliance policies.Update App
This screen allows you to modify the core details and configuration of your existing app. Follow the steps below to update your app efficiently. User can update App Name, Description,App Icon:Dashboard > App > Three Dots > Update App
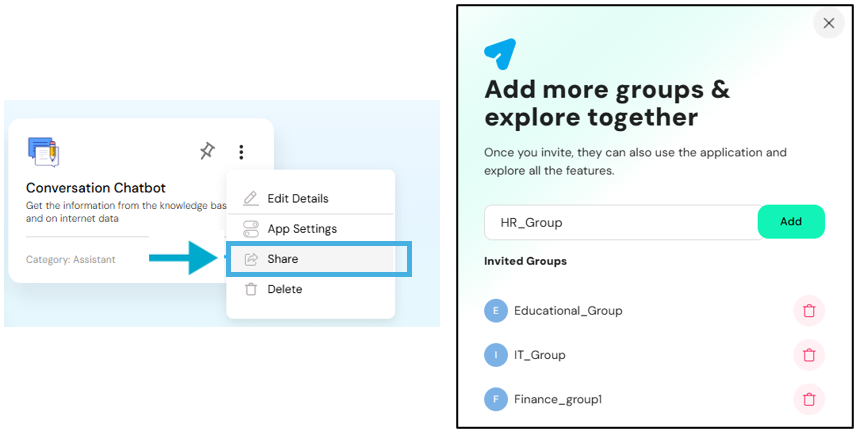
Share App
Once the app is created, users can click the “Share App” button to collaborate with others. This feature allows you to add additional groups who can access and explore the app together. By entering a group name and clicking “Add”, the selected group is invited. Members of the invited groups will then be able to use the application and benefit from all its features, fostering shared access and team collaboration.Dashboard > App > Three Dots > Share App
Publish App
Once all the app settings are configured and saved such as selecting the app type, assigning templates, managing access groups, and defining permissions the app will initially appear in Draft mode. In this state, the app is visible only to the creator and assigned collaborators for review and testing. To make the app accessible to a broader audience or intended users, simply click the “Publish” button. This action finalizes the setup and officially launches the app, making it available on user dashboards based on the configured access controls.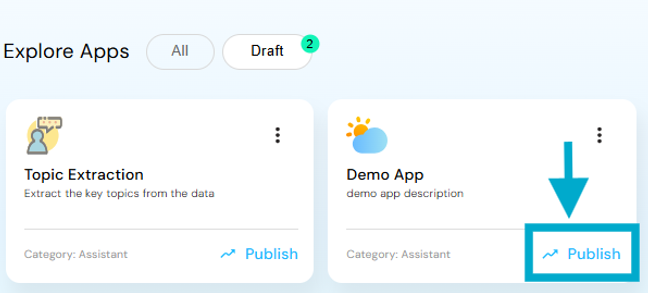
Role-Based Feature Visibility
Create App button is only visible to:- Super Admins, or Admins of an active tenant.
- App Settings is visible only to users who are Admins of the respective active tenant.
- Admins cannot access settings of inactive tenants or tenants they are not assigned to.
App Settings
Tags
Tags, allows users to create and manage custom labels that help organize and filter applications efficiently.
Groups
Groups, provides a centralized way to manage user access and streamline app-level permissions.
Access Rights
The Access Rights allows administrators to define and control the permissions associated with different user groups.
Model Selection
This section lists the Language and Embedding Models associated with the selected key.
API-Key Verification
This section allows Admins and Super Admins to validate API keys that were previously generated in the LLM Management service.
File Upload
This section allows Admins to seamlessly upload and manage multiple documents for contextual question answering and information retrieval.
Smart Parsers
Parser Preferences allow you to choose how the file content is processed for optimal retrieval and accuracy.
Workflow & Agent Management
These configurations enables teams to tailor the Personal Assistant experience based on their app’s purpose.
configure User Experience
This section allows administrators to enable/disable the toggles helps to tailor the platform’s functionality to your organization’s needs.